Skip to content
assostro-header-logo
assistro
  • Integrations
    • Zapier
    • Shopify
    • Hubspot
    • WordPress
    • Chrome Extention
    • Metro Accounting (Coming soon)
    • Flavor CRM (Comming soon)
  • Learn
    • Blog
    • Developer Guide
    • User Guide
    • Tutorial
  • Pricing
  • Contact Us
Get Started

SyncMate

8
  • How to Send Message to a WhatsApp Group – Guide to Fetch Group ID
  • Troubleshooting and Reconnection Guide
  • Connect your Contact Form 7 App with SyncMate
  • Connect your WooCommerce App with SyncMate
  • Connect your HubSpot App with SyncMate
  • Connect your Custom App with SyncMate
  • How to Connect your WhatsApp with SyncMate?
  • How to use SyncMate X Shopify Application ?

Other

6
  • Getting Started with SyncMate and Shopify Integration: A Step-by-Step Guide
  • After Installation : Setting up SyncMate Chrome Extension
  • Assistro Dashboard
  • How to use SyncMate in a 3rd Party application via OAuth – The Secure way
  • How to back up your WhatsApp chats in HubSpot?
  • SyncMate User Guide: Regenerating Your Token

Extension

3
  • Bulk messaging at a scheduled time using SyncMate
  • Send Message at a scheduled time using SyncMate
  • Define your own template to send schedule message
View Categories
  • Home
  • user-guide
  • Other
  • Getting Started with SyncMate and Shopify Integration: A Step-by-Step Guide

Getting Started with SyncMate and Shopify Integration: A Step-by-Step Guide

< 1 min read

Welcome to the world of seamless integration between SyncMate and Shopify! This step-by-step guide will walk you through the process of setting up SyncMate to work seamlessly with your Shopify store. By the end of this guide, you’ll be well-equipped to harness the power of SyncMate for efficient communication and automation on your Shopify platform.
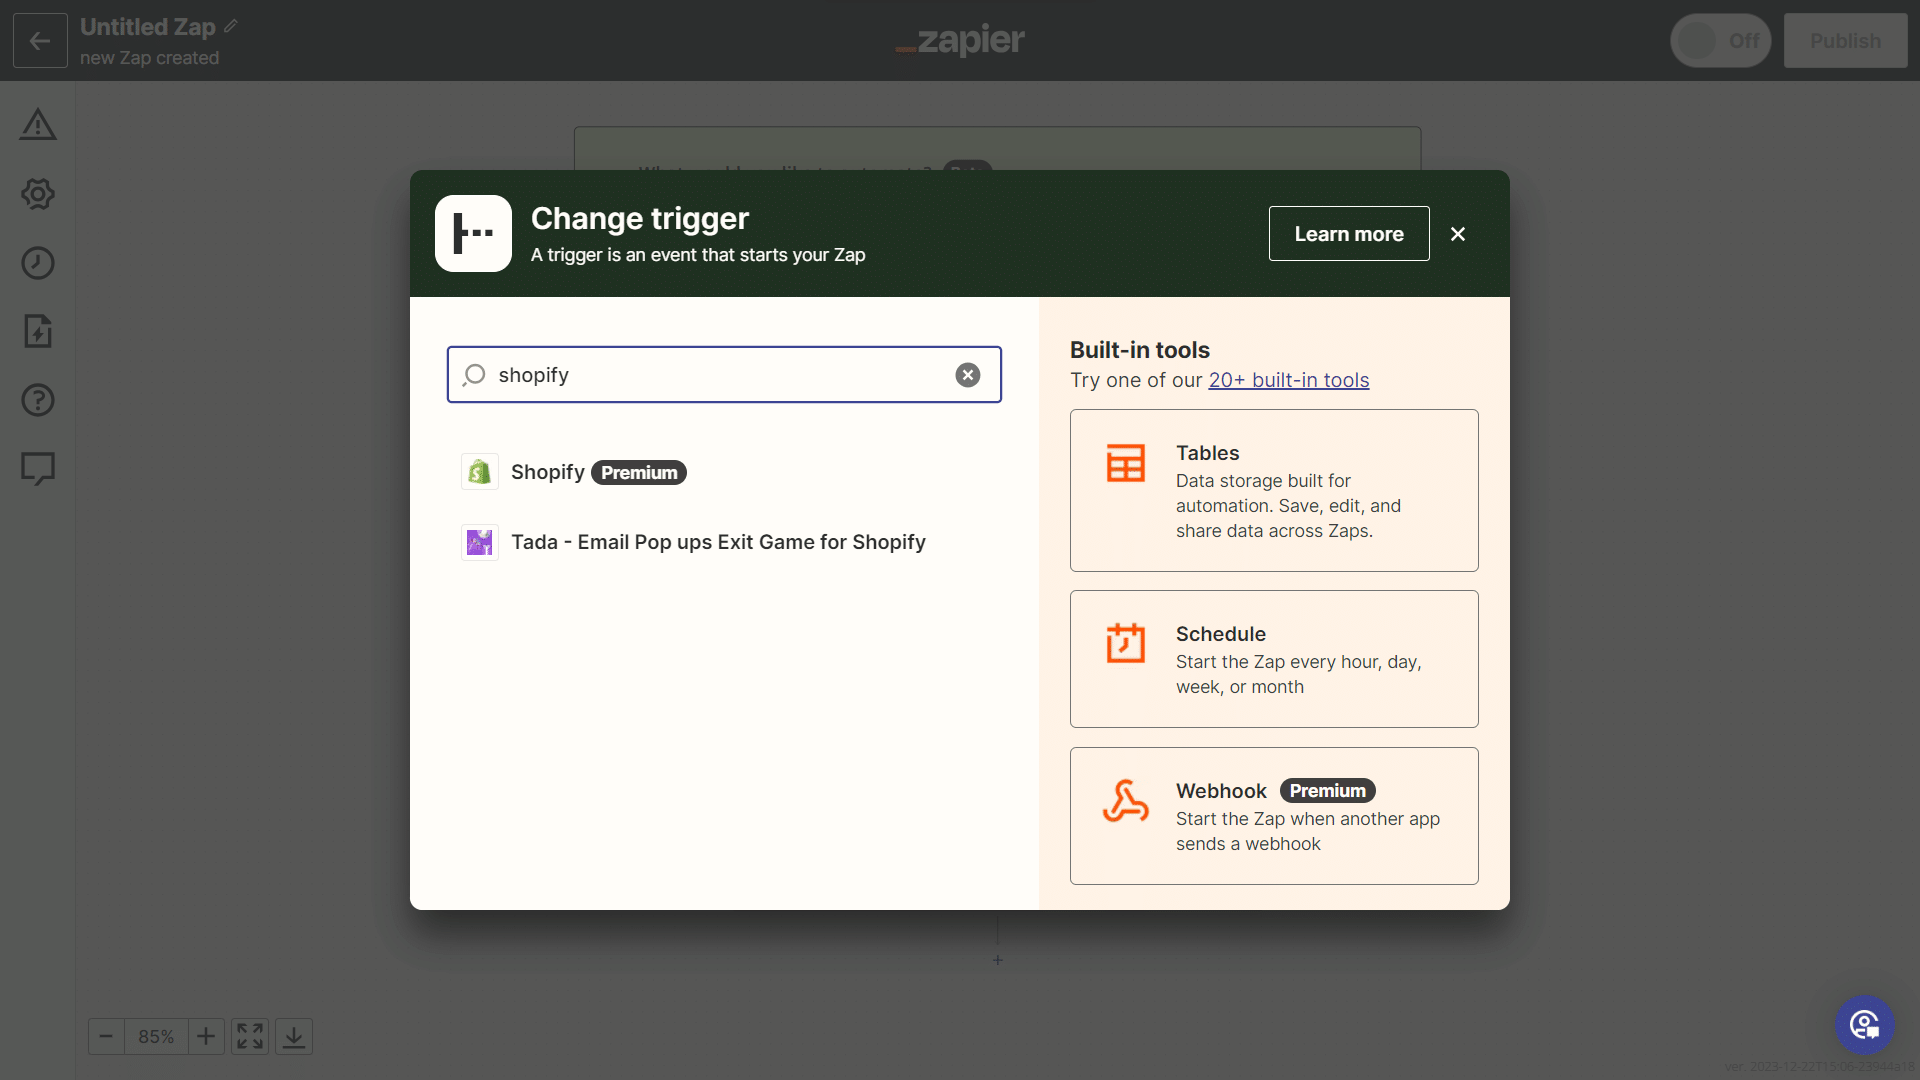
 
Step 1 
Go to Zapier and select Shopify as the trigger.
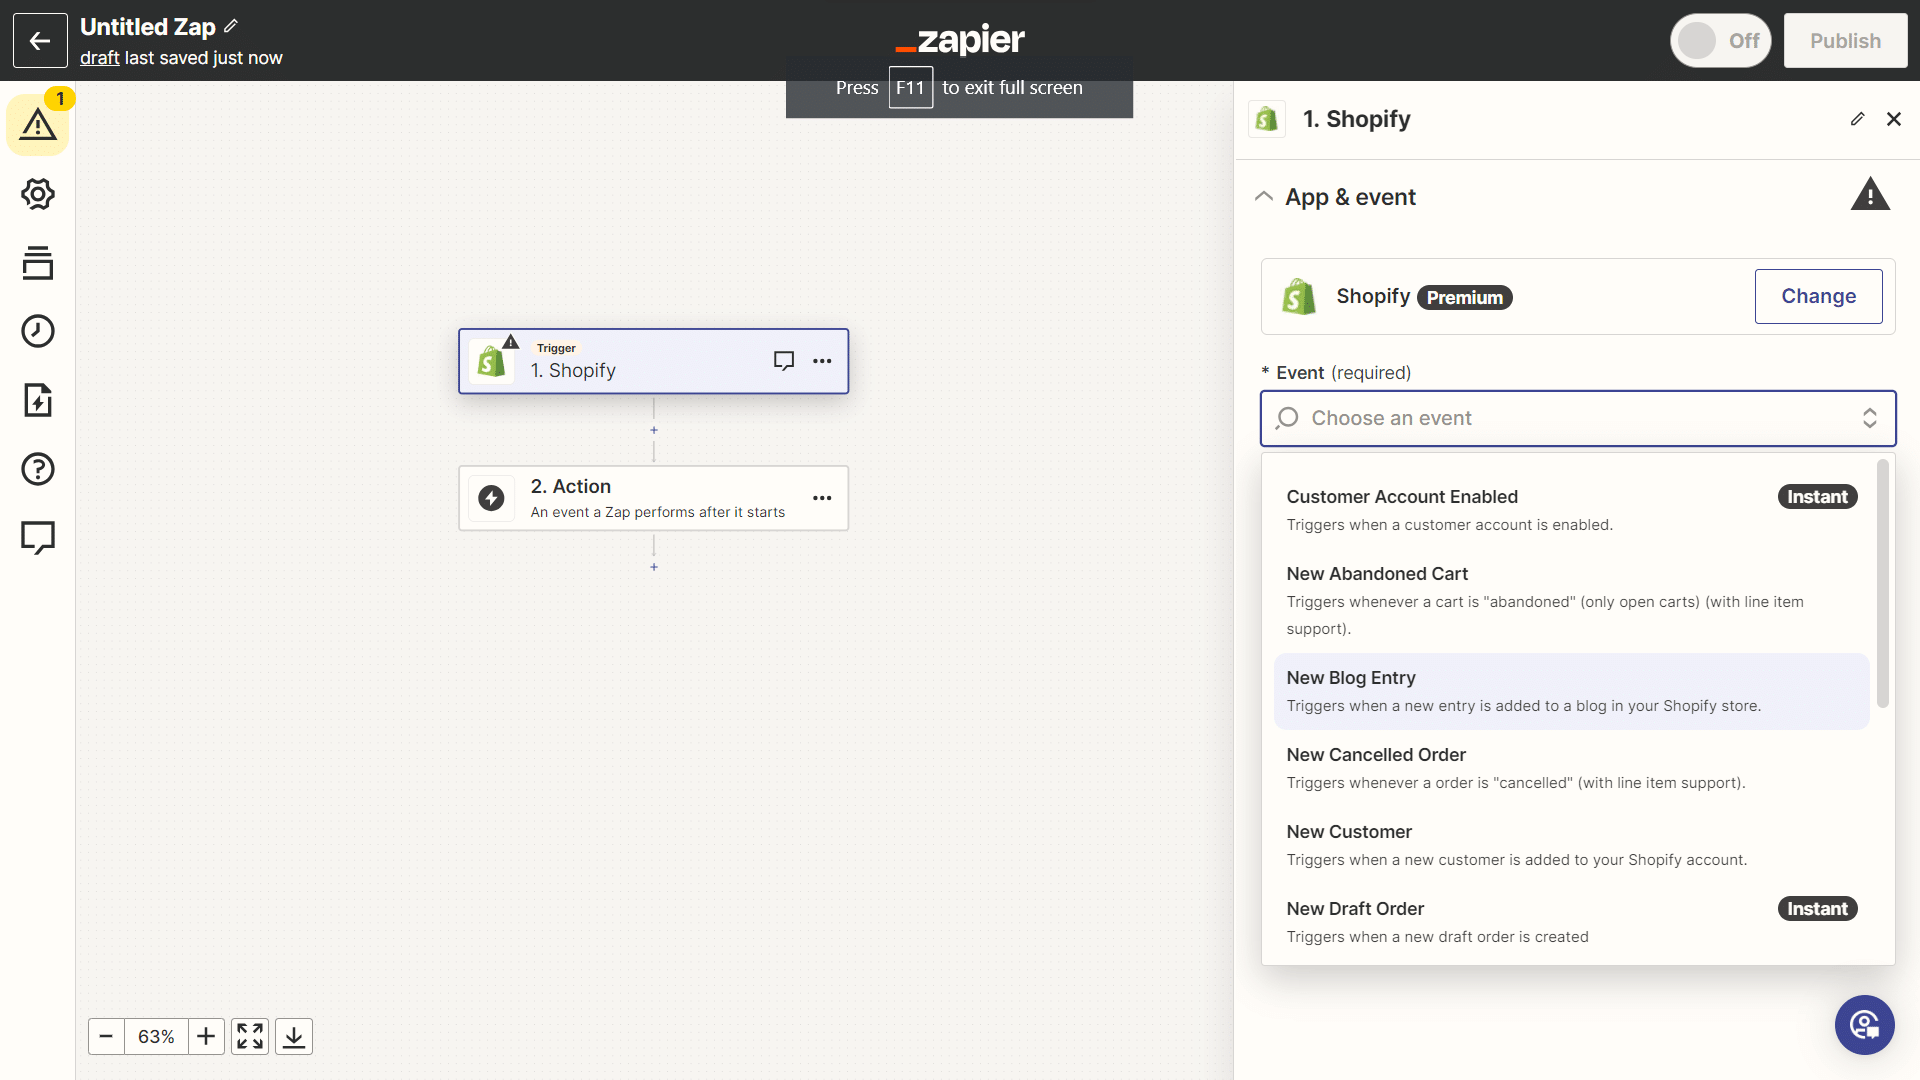
 
Step 2 
Select a trigger of your choice on when you want to send WhatsApp messages whenever a particuar event occurs in your Shopify store.
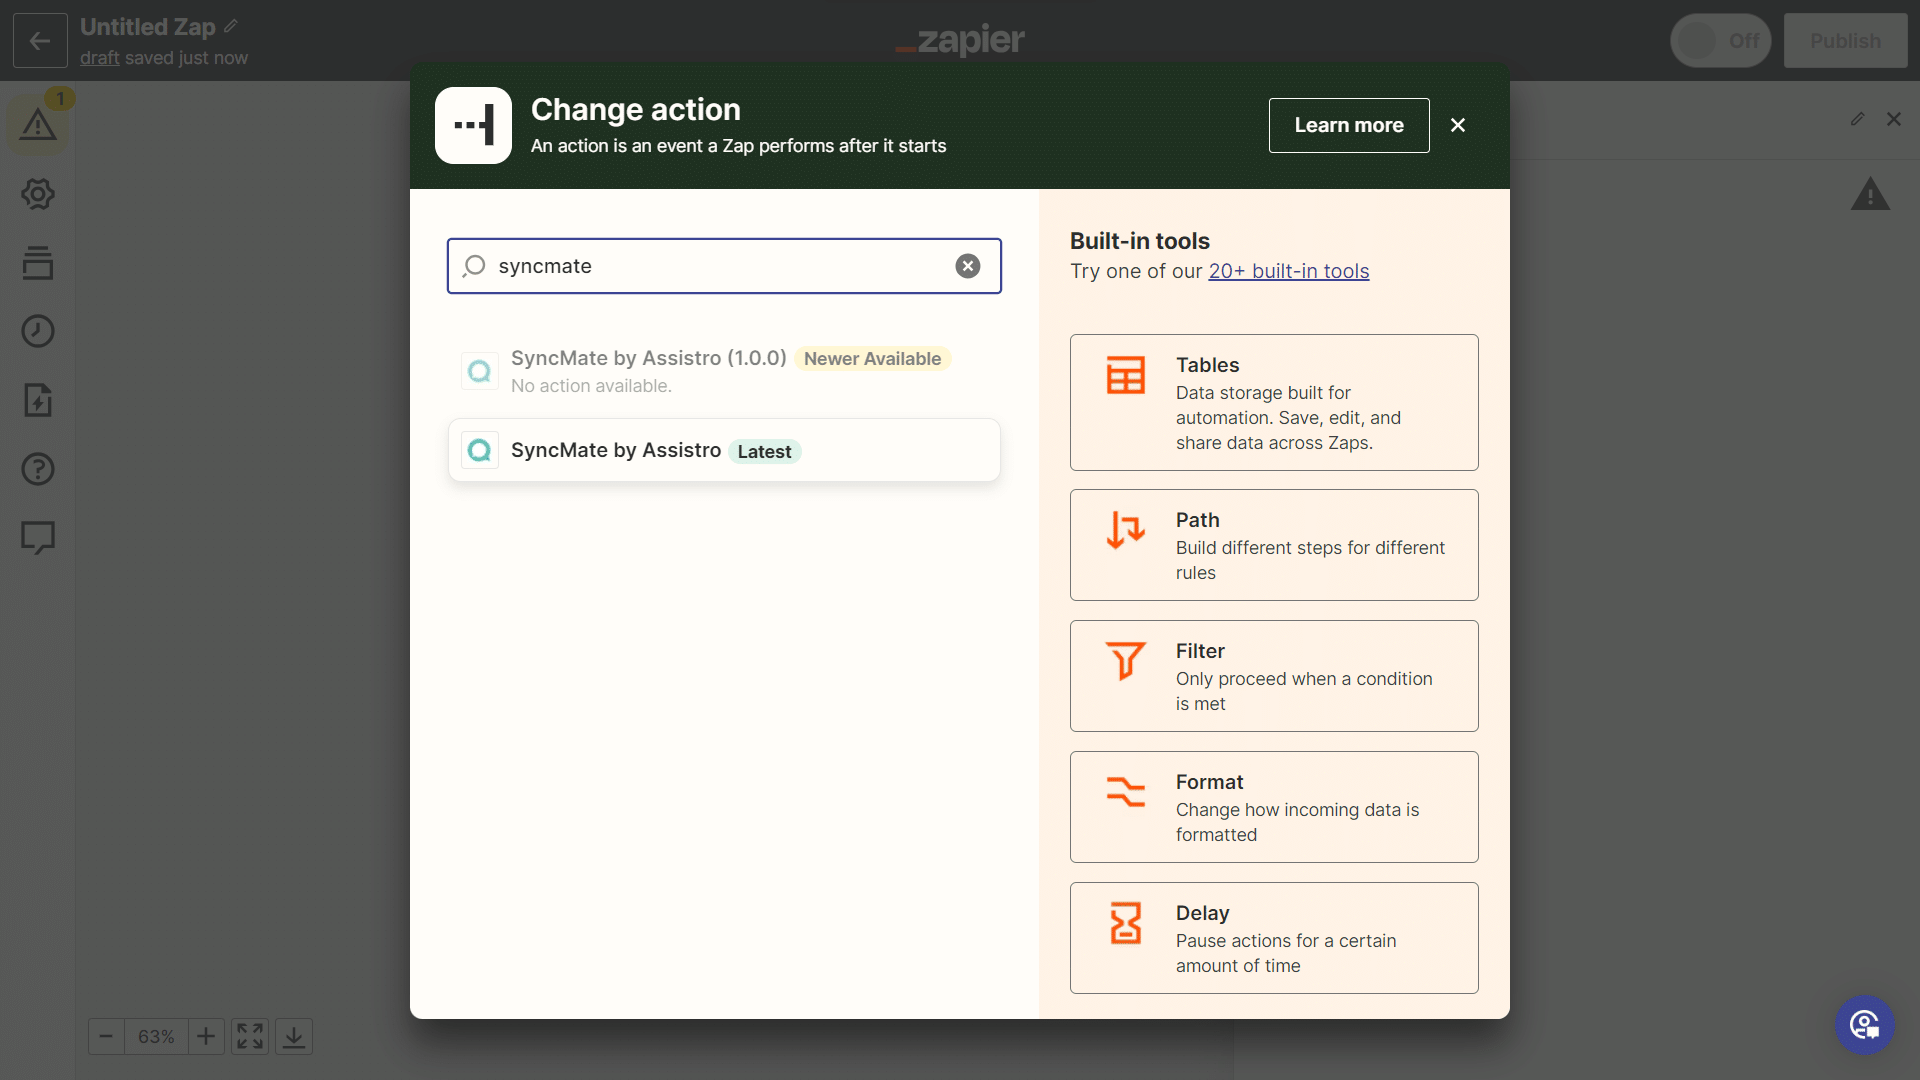

 
Step 3
Now, once your shopify trigger is set, select SyncMate by Assistro as the action app.

 
Step 4
Select any action by which you want to send WhatsApp notifications.

 
Step 5
Once your Zapier setup  is done, you need to configure your WhatsApp with SyncMate. you can check these configuration guide to know more. click on WAPushPlus Configuration guide or WApush configuration guide .
 
Step 6
Now, you are all set to unleash the power of SyncMate and Shopify integration. Now whenever the event specified in the trigger will occur a whatsapp message will be sent to them.

Updated on August 29, 2025

What are your Feelings

  • Happy
  • Normal
  • Sad
Share This Article :
  • Facebook
  • X
  • LinkedIn
  • Pinterest
After Installation : Setting up SyncMate Chrome Extension
assistro

We’re your innovation partner, delivering cutting-edge solutions that elevate your business to the next level.


    Navigation

    • Integrations
    • Pricing
    • Contact Us

    Integrations

    • Zapier
    • Shopify
    • Hubspot
    • Wordpress
    • Chrome Extension
    • Metro Accounting [Coming soon]
    • Flavor CRM [Coming soon]

    Learn 

    • Blogs
    • Developers
    • User Guide
    • Tutorials

    © Copyright 2025, All Rights Reserved by Assistro